
Packing for a trip back to New Zealand from Japan is always a challenge. It’s hard to resist buying affordable and high-quality clothes or food items that are expensive or hard to find in NZ. Before I knew it, my belongings had multiplied. Buying another suitcase every time isn’t a sustainable solution, so this time, I tried something different.
That’s right. I gave the “non-suitcase option” a go.
Why I Chose Cardboard Boxes This Time
Wrapping Service at Narita Airport
Final Thoughts on Travelling with Cardboard Boxes
Tips for Travelling with Cardboard Boxes
Why I Chose Cardboard Boxes This Time
During this visit to Japan, my partner returned to New Zealand two weeks earlier than I did. Since we’d already bought quite a few things, I had him take both his suitcase and mine—two checked bags total.
Still, the stuff kept piling up. Instead of buying another suitcase, I decided to bring the rest back in two cardboard boxes.
Why?
1. I didn’t want to accumulate more suitcases.
2. I wanted to bring back as much as possible.
Box Dimensions and Contents
I used a Yamato Transport box labelled “Size 14” that happened to be at home (40×60×40cm, total 140cm).
Box 1 contained:
Clothes (including Uniqlo winter wear and pieces gifted by my mother)
Food and Snacks
Beauty products
Daily necessities and household items
Fragile items and kitchenware (such as a high-quality knife received as a wedding gift and ceramic dishes from my mother)
Box2:
A floor mat I bought online (left in the shipping box it came in)
Since I’ve sent gifts from NZ to Japan many times, I’ve gotten pretty good at packing things in cardboard boxes. The key is to pack everything tightly so it doesn’t move inside. For example, I kept fragile ceramics in their original boxes and tucked them into stable corners. I also wrapped rice crackers and boxed sweets in bubble wrap.
Wrapping Service at Narita Airport
Even though the contents were protected, the boxes themselves felt too vulnerable to travel as-is. So I used the baggage wrapping service at Narita Airport.
I went to wRapper RAPI, located on the 4th floor of Terminal 1 South Wing near the check-in counters. It costs about 2,000 yen per box. For reference, the full price list is available on their website.
The full plastic wrap gave the boxes added strength, but it also made them harder to identify later. While waiting for my boxes to be wrapped, I chatted about the issue with my parents. A friendly staff member overheard us and kindly lent me a marker so I could draw initials and doodles on the boxes to make them easier to spot—problem solved!
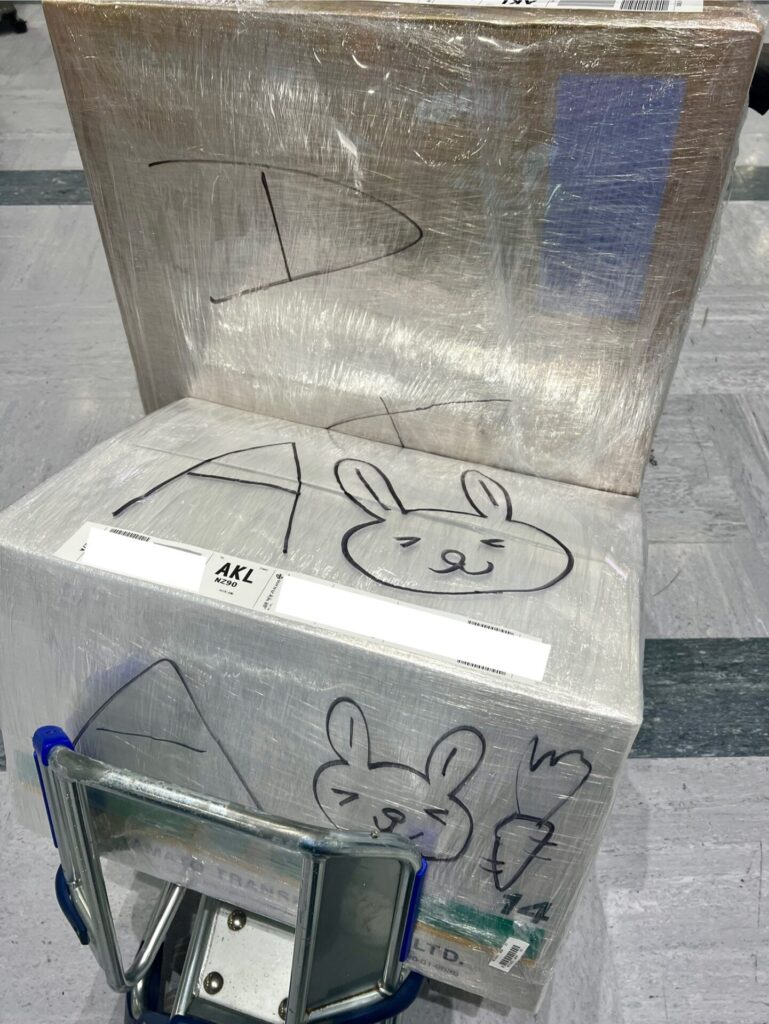
Air New Zealand uses self-service kiosks for both check-in and baggage drop-off for economy class passengers. Since I had a large, irregularly shaped box (the floor mat), I couldn’t use the self-service kiosk at the Air New Zealand check-in counter. Staff directed me to the manned counter, where check-in went smoothly.
Arrival in NZ and Customs
At the baggage claim in Auckland Airport, I had no trouble finding my boxes. The irregularly shaped box was treated as special luggage and placed next to the conveyor belt. There was no visible damage.
This is a bit of a tangent, but I also wanted to note a recent change in NZ’s arrival process that might be useful for future travellers.
Recently, New Zealand customs procedures have changed—specifically, the New Zealand Traveller Declaration (NZTD) is now fully digital. This system requires travellers to declare any goods, food items, or health-related information online before arrival.
When I last entered New Zealand in February 2024—just over a year ago—it was still done on the familiar yellow paper form, so I was surprised to learn mid-flight that it’s now online-only. Paper forms are still available at the airport, but only for travellers who can’t complete it digitally. Fortunately, the in-flight Wi-Fi made it easy to submit, and the website even supports Japanese. If you’re headed to New Zealand, I recommend completing it via the website or app before landing.
I was asked about the contents a few times by customs officers. I guess it was because I was travelling with two cardboard boxes instead of suitcases like a normal traveller. I explained honestly—snacks, seasonings, clothing, beauty products. e.t.c.—and had no issues. I was directed to the express lane and didn’t need to go through an X-ray scan.
I always use an airport cart, so whether it’s suitcases or cardboard boxes doesn’t make much difference. Thanks to my family for picking me up in Japan and New Zealand, getting home was just as easy.
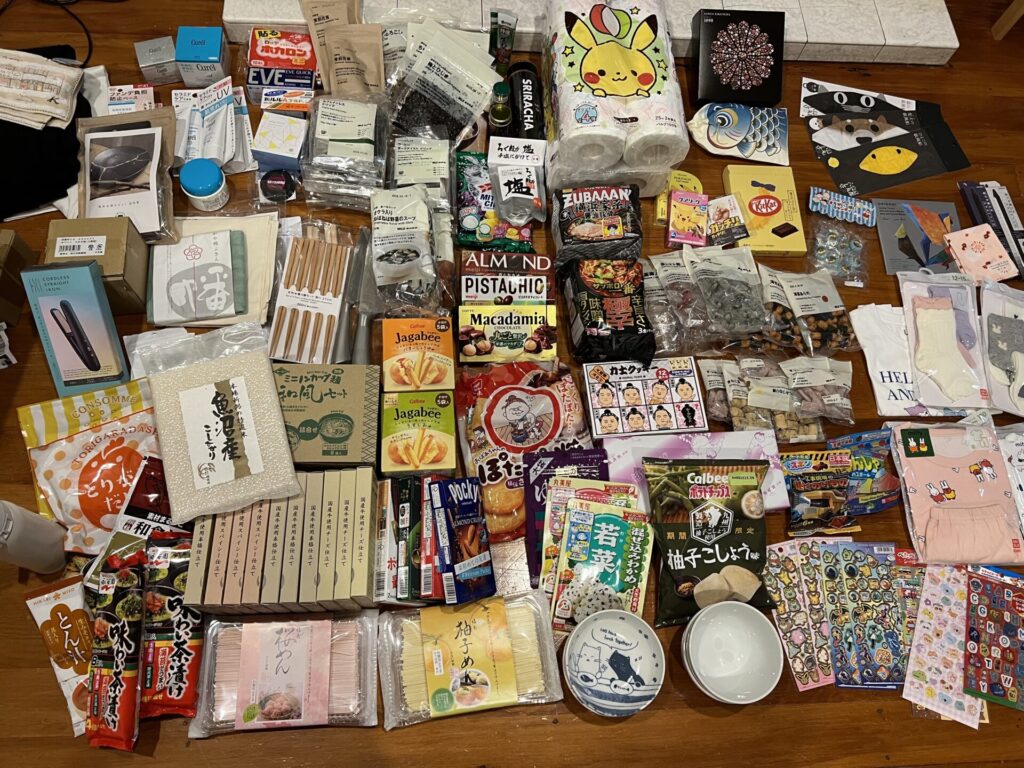
Here’s a quick snapshot of my unpacking at home in NZ—just a small part of it!
Final Thoughts on Travelling with Cardboard Boxes
After trying it, I can say cardboard is a surprisingly smart and practical alternative.
No need to buy another suitcase
Easy to discard after arrival
With smart packing, it holds more than expected
Next time I return with a lot of stuff, I might go with cardboard again.
Tips for Travelling with Cardboard Boxes
- Check the size and weight limits: Most airlines, including Air NZ, allow checked baggage up to 158cm total (L+W+H), with a standard weight limit of 23kg. Always confirm your airline’s specific checked baggage policies in advance.
- Wrapping service might be essential: Available at airports and great for protecting your boxes during transit.
- Label clearly: Use initials or stickers to make boxes easy to spot.
- Protect fragile items: Use bubble wrap, clothes, or towels.
- Plan your ground transport: Cardboard boxes can be tricky to carry, so arrange rides or transport in advance.
I hope this helps anyone considering the cardboard box strategy for their next trip!